If you’re a fan of space, astronomy, or just love the look and vibe of the galaxy, creating a galaxy painting on canvas is a fantastic way to bring this inspiration to life! With the right tools and know-how, you too can create a stunning galaxy painting that will awe and inspire all who view it. In this guide, we will break down the steps and techniques required to create a beautiful galaxy painting on canvas, providing tips and tricks along the way.
Gathering the Necessary Supplies for a Galaxy Painting
Before you begin your painting, it’s important to have all of the necessary supplies ready and waiting. You will need:
- Canvas – this can be any size you prefer, but for beginners, a 16×20 inch canvas is a good start
- A set of acrylic paints – choose colors that reflect what you want your galaxy to look like, such as blues, purples, pinks, and whites
- Paintbrushes – a variety of sizes and shapes will allow you to create different textures and details
- Sponges – for blending and creating space-like textures
- Glitter or metallic paints – optional, but can add a beautiful 3D effect to your galaxy painting
- Protective coating – such as a varnish or sealant to protect your finished painting
Aside from the basic supplies, there are a few additional items that can make your galaxy painting experience even more enjoyable. Consider investing in a palette knife, which can be used to create unique textures and blend colors together seamlessly. You may also want to have a spray bottle filled with water on hand, as misting your canvas can create a beautiful starry effect.
Another important aspect to consider is your workspace. Make sure you have a clean, well-lit area to work in, with plenty of ventilation. Cover your work surface with a drop cloth or old newspaper to protect it from any accidental spills or splatters. And don’t forget to have a comfortable chair to sit in, as painting can be a time-consuming process!
Setting Up Your Workspace for a Galaxy Painting
Once you have gathered all of your supplies, it’s time to set up your workspace. Make sure you have a clean and flat surface to work on, with ample lighting and ventilation. Cover your surface with a drop cloth or old newspaper to protect it from any spills or drips. Finally, fill a jar with water for cleaning your brushes as you work.
It’s also important to have a comfortable chair and to position your canvas at a comfortable height. This will help prevent any strain on your back or neck while you work. Additionally, consider playing some calming music or lighting a candle to create a relaxing atmosphere while you paint.
Preparing the Canvas for a Galaxy Painting
Before you begin painting, it’s important to prepare your canvas. Start by applying a thin layer of white gesso evenly across the canvas. This will create a blank canvas for you to work on, and ensure your paint adheres evenly. Allow the gesso to dry completely before moving on to the painting stage.
Once the gesso has dried, you can begin sketching out your galaxy design using a pencil. This will help you plan out the placement of stars, planets, and other celestial objects. Don’t worry about making mistakes, as you can always erase and adjust your sketch as needed. Once you’re happy with your sketch, you can start painting your galaxy using a combination of blues, purples, pinks, and whites. Remember to blend your colors together to create a seamless, ethereal effect.
Choosing the Right Colors for a Galaxy Painting
The colors you choose for your galaxy painting will set the tone and mood for your artwork. You’ll want to choose colors that are reflective of space, such as dark blues, purples, and blacks, along with some lighter colors like pinks and whites to create a more galaxy-like effect. You can experiment with different color combinations and intensities to see what works best for you.
It’s important to keep in mind that the colors you choose will also affect the overall composition of your painting. For example, using too many bright colors may make the painting appear chaotic, while using too many dark colors may make it appear too somber. It’s all about finding the right balance and creating a cohesive piece of art that captures the beauty and mystery of the galaxy.
Mixing Colors to Create a Stunning Galaxy Effect on Canvas
Once you’ve chosen your colors, it’s time to start mixing them to create a beautiful galaxy effect. Start with the darkest color (usually black) and apply it across the canvas, leaving some areas blank for other colors to fill in later. Then, mix a few drops of white with your colors to create a range of shades that simulate space and stars.
When mixing your colors, it’s important to remember that less is often more. Start with a small amount of paint and gradually add more until you achieve the desired shade. It’s also a good idea to mix more paint than you think you’ll need, as it can be difficult to recreate the exact same shade if you run out.
Another technique to create a stunning galaxy effect is to use a sponge or a toothbrush to splatter paint onto the canvas. This creates a starry, speckled effect that adds depth and texture to your painting. Experiment with different techniques and colors to create a unique and beautiful galaxy painting.
Creating a Base Layer for Your Galaxy Painting
With your colors mixed and ready to go, it’s time to start creating your base layer. Use a sponge to apply different colors across the canvas, blending them together to create a stunning galaxy effect. Don’t be afraid to layer your colors, and remember to leave some areas blank for later details like stars and nebulas.
When creating your base layer, it’s important to consider the overall composition of your painting. Think about where you want the focal point to be and use your colors to guide the viewer’s eye towards that area. You can also experiment with different textures and techniques, such as splattering or dripping paint, to add more depth and interest to your base layer.
Another helpful tip is to work in layers, allowing each layer to dry before adding the next. This will prevent your colors from becoming muddy and ensure that your painting has a smooth, even finish. Remember, creating a galaxy painting is all about having fun and letting your creativity shine, so don’t be afraid to try new things and make mistakes along the way!
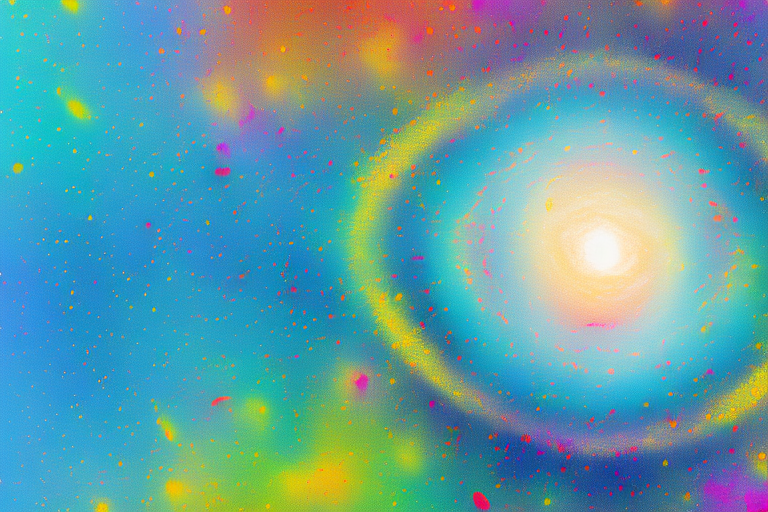
Adding Stars and Nebulae to Your Galaxy Painting
Now that your base layer is complete, it’s time to start adding some details like stars and nebulas. Use a small paintbrush to add stars of different sizes and brightness levels across the canvas. You can also use a small sponge to create nebulas by applying color in a circular motion, softly blending with other colors as you go.
When adding stars, it’s important to vary their placement and size to create a more realistic effect. Try clustering some stars together in groups, while spacing others out more sparsely. Additionally, consider using a white or metallic paint to add a subtle shimmer to some of the stars. For nebulas, experiment with different color combinations to create a range of effects, from bright and bold to soft and subtle. Remember to blend the colors together gently to avoid any harsh lines or edges.
Using Different Techniques to Create Different Textures in Your Galaxy Painting
Galaxies can have a variety of texture types, from smooth to rough and everything in between. Use different techniques like splattering with a paintbrush, dabbing with a sponge or even dragging a feather across the paint to create unique textures that will give your painting even more depth.
Another technique you can use to create texture in your galaxy painting is to apply the paint with a palette knife. This will create a thick, impasto texture that can mimic the swirling clouds and dust in a galaxy. You can also experiment with layering different colors and textures to create a more complex and dynamic painting.
Creating a 3D Effect on Your Galaxy Painting with Glitter and Metallic Paints
If you want to add an extra element of dazzle to your galaxy painting, you can use glitter or metallic paints to create a 3D effect. Use a small paintbrush to gently apply the glitter or metallic paint to areas where you want to create depth and dimension, such as around stars or in nebulae.
When using glitter or metallic paints, it’s important to use them sparingly. Too much glitter or metallic paint can overpower the painting and make it look gaudy. Instead, use a light touch and build up the effect gradually until you achieve the desired level of sparkle.
Another technique you can use to create a 3D effect is to layer your paints. Start with a base layer of dark colors, such as black or navy blue, and then add lighter colors on top. This will create the illusion of depth and make your galaxy painting look more realistic.
Adding Depth and Dimension to Your Galaxy Painting with Layers
If you want to make your galaxy painting even more interesting, you can add layers of paint to create even more depth and dimension. Start by adding a layer of black paint over your base layer, then use a sponge or paintbrush to blend in additional colors. Keep layering until you achieve the desired effect.
Another technique to add depth and dimension to your galaxy painting is to use a dry brush technique. Dip your brush into the paint, then wipe off most of it onto a paper towel. Lightly brush the paint onto your canvas, creating a subtle texture that adds interest to your painting.
Finally, consider adding metallic or iridescent paint to your galaxy painting. These paints can add a shimmering effect that mimics the look of stars and galaxies. Use a small brush to add dots of metallic paint throughout your painting, or create a gradient effect by blending metallic paint with your other colors.
Tips and Tricks for Creating Realistic Looking Galaxies on Canvas
To create a more realistic galaxy painting, consider studying real photos of galaxies and space art for inspiration. Use reference images to better understand composition and color choices, experiment with different techniques, and remember that practice makes perfect.
Common Mistakes to Avoid When Creating a Galaxy Painting
Avoid mistakes by not using too much paint and not getting the correct shades of color You want to make sure the shades of each color blend cohesively together. Avoid over-crowding and cluttering, and also avoid becoming too frustrated if the first painting does not come out as desired.
How to Display and Protect Your Finished Galaxy Painting
Once you have finished your galaxy painting on canvas, it’s important to display it properly and protect it from damage. Make sure your painting is completely dry and apply a sealant or varnish to protect it from UV rays and dust. Then, choose a location to hang your painting – a well-lit spot where it can be admired is ideal.
Exploring Different Variations of the Galaxy Painting Technique
While this guide provides a solid foundation for creating a galaxy painting on canvas, there are many variations and techniques you can use to create unique and personalized artwork. Don’t be afraid to experiment and try new things, and have fun with the process.
With these tips and tricks, you can create a stunning galaxy painting on canvas that will inspire and awe all who view it. Happy creating!