Do you want to explore the fascinating world of constellations while also creating a stunning piece of art? Look no further than scratch art! This craft is not only fun for kids and adults alike, but it also offers a wide range of benefits, including improved fine motor skills and increased creativity. In this article, we will provide a complete guide on how to make your own constellation scratch art with black paper and a wooden stylus.
Discover the Fascinating World of Constellations
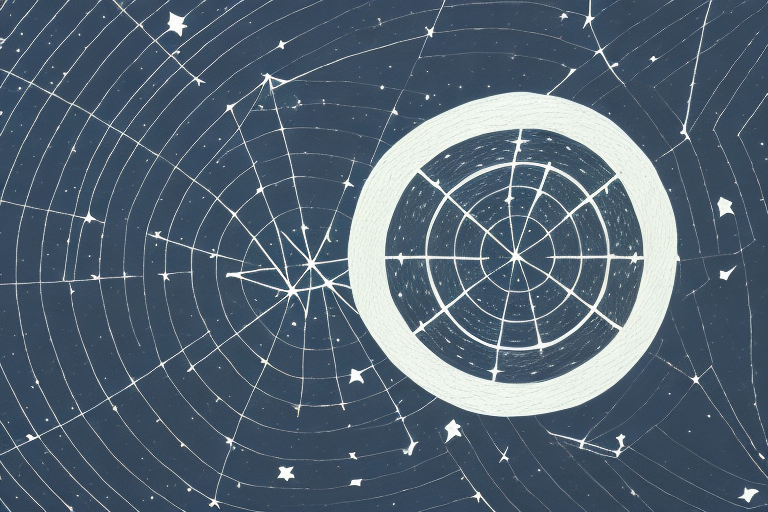
Before we dive into the details of making your scratch art, let’s take a moment to explore the captivating world of constellations. From the Big Dipper to Orion’s Belt, these groups of stars have been studied and celebrated for centuries, serving as a source of inspiration for artists, astronomers, and storytellers alike. By creating your own constellation scratch art, you can bring these magical celestial arrangements to life in a unique and exciting way.
Did you know that constellations have been used for navigation for thousands of years? Sailors and travelers would use the stars to guide them on their journeys, and even today, pilots and astronauts use constellations to help them navigate in space. Additionally, many cultures have their own unique stories and myths surrounding the constellations, adding to their rich history and significance. So not only are constellations beautiful to look at, but they also hold practical and cultural importance.
The Benefits of Scratch Art for Kids and Adults
Scratch art is not only fun, but it also offers a wide range of benefits for both kids and adults. For children, scratch art is an excellent way to practice fine motor skills, hand-eye coordination, and creativity. Adults can also benefit from the stress-relieving and meditative qualities of scratch art. Plus, scratch art supplies are affordable and easy to find, making it a great option for individuals and families on a budget.
In addition to the benefits mentioned above, scratch art can also be used as a tool for therapy. Art therapy has been shown to be effective in reducing stress, anxiety, and depression. Scratch art, in particular, can be a great way for individuals to express themselves and work through their emotions in a non-verbal way. It can also be a fun and engaging activity for group therapy sessions.
A Beginner’s Guide to Scratch Art Techniques
If you are new to scratch art, it can be helpful to familiarize yourself with some basic techniques. One approach is to use a wooden stylus to scratch away the surface layer of black paper, revealing vibrant colors beneath. Another technique is to use multiple layers of scratch paper, creating a unique design with each layer. Experiment with different techniques to find the approach that works best for you.
Another important technique to consider is the use of stencils. Stencils can help you create more intricate designs and shapes with ease. Simply place the stencil on top of the scratch paper and use the stylus to scratch away the black layer around the stencil. This can be a great way to add more detail to your scratch art projects.
Materials Needed for Making a Constellation Scratch Art
To create your own constellation scratch art, you will need the following materials:
- Black scratch paper
- Wooden stylus
- White pencil or chalk
- Constellation guide (optional)
Gather your supplies, and let’s get started!
Before you begin, it’s important to choose the constellation you want to create. You can use a constellation guide to help you identify the stars and their patterns. Alternatively, you can create your own unique constellation by drawing your own pattern on the scratch paper.
Once you have your materials and your chosen constellation, use the white pencil or chalk to lightly sketch the stars and their connecting lines onto the black scratch paper. Then, use the wooden stylus to carefully scratch away the black coating, revealing the colorful layer underneath. Take your time and be patient, as the scratching process can be delicate and time-consuming.
Step-by-Step Instructions to Make Your Own Constellation Scratch Art
Follow these simple steps to create your own constellation scratch art:
- Begin by researching different constellations and choosing one that inspires you. You can use a guide or simply improvise your design.
- Using a white pencil or chalk, sketch your chosen constellation onto the black scratch paper. Don’t worry if your lines aren’t perfect – the imperfections will add character to your finished design.
- Once you’ve sketched your constellation, use the wooden stylus to scratch away the black paper, revealing the vibrant colors beneath. Start at the center of your design and work your way outward.
- Continue scratching away the surface paper until your entire constellation is revealed. Experiment with different scratch patterns and techniques to create a unique design.
After you’ve completed your constellation scratch art, you can frame it and display it in your home or give it as a thoughtful gift to a friend or family member. This art project is a great way to explore your creativity and learn about the stars and constellations.
If you’re feeling adventurous, you can also try making your own scratch paper by mixing black paint with dish soap and allowing it to dry on a sheet of paper. This will create a textured surface that is perfect for scratching away to reveal your constellation design.
Tips and Tricks for Creating Stunning Constellations
Here are some tips to help you create a stunning and unique constellation scratch art:
- Experiment with different scratch patterns to create texture and depth in your design.
- Use the wooden stylus to create intricate details, such as star clusters and individual stars.
- Don’t be afraid to make mistakes – scratch art is forgiving, and imperfections can add character to your finished piece.
Another tip for creating stunning constellation scratch art is to use a black background. This will make the stars and constellations stand out more and create a more dramatic effect. You can also experiment with adding different colors to your scratch art, such as blues and purples, to create a more mystical and otherworldly feel. Remember to have fun and let your creativity shine through in your design!
How to Choose the Best Wooden Stylus for Your Art Project
When it comes to choosing a stylus for your constellation scratch art, there are a few considerations to keep in mind. Look for a stylus that is comfortable to hold and easy to use. A pointed tip can be helpful for creating intricate details, while a wider tip may be better for larger areas. Test out different stylus options to find the one that works best for you.
Another important factor to consider when choosing a wooden stylus is the type of wood it is made from. Different types of wood can have varying levels of hardness and texture, which can affect the way the stylus interacts with the scratch art paper. Some popular options include birch, maple, and cherry wood.
It’s also worth considering the length and thickness of the stylus. A longer stylus may be more comfortable for some artists, while a thicker stylus can provide a better grip. Keep in mind that the size and shape of the stylus can also impact the overall look and feel of your scratch art piece.
Customizing Your Design: Adding Colors to Your Scratch Art
If you want to take your scratch art to the next level, consider adding some color to your design. One approach is to use colored pencils or markers on the scratch paper before scratching away the black layer. Another option is to use a paintbrush and watercolors to create a wash over your finished design. Experiment with different coloring techniques to find the one that best suits your artistic vision.
Another way to add color to your scratch art is to use oil pastels. Apply the pastels to the scratch paper before scratching away the black layer. The oil pastels will resist the black layer and create a vibrant, colorful design. You can also blend different colors of oil pastels together to create unique color combinations.
If you want to create a more textured look to your scratch art, consider using sandpaper to add color. Rub the sandpaper over the scratch paper to create a rough surface. Then, use colored pencils or pastels to color in the raised areas. When you scratch away the black layer, the colored areas will stand out and create a textured effect.
Framing and Displaying Your Finished Constellation Scratch Art
When your masterpiece is complete, it’s time to showcase it! Consider framing your artwork for a professional look, or simply display it on a bulletin board or refrigerator for all to admire. Be sure to sign and date your art, and take pride in the unique and stunning piece you’ve created.
If you choose to frame your artwork, consider using a mat to enhance the presentation. A mat is a border that surrounds the artwork within the frame, and it can be used to create a visual separation between the art and the frame. You can purchase pre-cut mats in a variety of sizes and colors, or you can cut your own using a mat cutter. Experiment with different mat colors and textures to find the perfect combination that complements your artwork.
Inspiring Ideas for Using Your Constellation Scratch Art
Your constellation scratch art doesn’t have to be limited to just wall art – here are some inspiring ideas for using your finished design:
- Create greeting cards with your scratch art design
- Use your design as the cover of a journal or sketchbook
- Scan and print your design onto fabric to create a unique piece of clothing or home decor
- Frame multiple scratch art designs to create a gallery wall
We hope this guide has inspired you to try out scratch art and create your own stunning constellation design. With a bit of patience, creativity, and some basic supplies, you can create a unique and beautiful piece of art that celebrates the wonders of the night sky. Enjoy the process, and happy scratching!
Another great idea for using your constellation scratch art is to create a personalized phone case. Simply scan your design and upload it to a custom phone case website, or print it out and use it as a template to create your own DIY phone case. This way, you can carry your love for the stars with you wherever you go!