Have you ever wanted to grow your own crystals at home? Epsom salt crystals are a fun and easy way to grow beautiful crystals in your own kitchen!
Epsom salt, also known as magnesium sulfate, is a mineral compound that can form stunning crystalline structures when allowed to precipitate out of a saturated salt solution. With just a few simple materials, you can set up crystal growing experiments that allow you to observe the crystalline structures and geometric shapes as they slowly form over hours or days.
In this beginner’s guide, we’ll cover everything you need to know about growing Epsom salt crystals at home, including:
- The factors that affect crystal growth rate and size
- Step-by-step instructions for setting up crystal growing experiments
- Tips for growing large, beautifully formed single crystals
- The science behind how crystals form and grow
- Creative ways to use your homemade crystals
So let’s get started with the basics of this fun, hands-on science activity!
How Long Does It Take Epsom Salt Crystals to Form?
The amount of time it takes for Epsom salt crystals to fully form can range anywhere from 4-7 hours to 7 days or longer. There are a several key factors that affect the crystal growth rate:
Temperature
- Higher temperatures speed up evaporation, allowing crystals to grow faster. Ideal temps are between 60-100°F.
- Lower temperatures slow down evaporation, yielding slower crystal growth. The fridge allows a gradual crystallization.
Concentration of the Salt Solution
- A saturated salt solution contains the maximum amount of dissolved Epsom salt, which speeds up crystallization.
- Unsaturated solutions have less salt dissolved, causing the crystals to grow more slowly.
Disturbances
- Leaving the solution undisturbed allows the best crystal growth.
- Disturbances like vibrations or jostling can disrupt crystal formation.
With optimal conditions of high saturation, warmer temperature, and no disturbances, Epsom salt crystals can begin to form within 4-8 hours as the water evaporates. Large, well-defined crystals can grow within 1-7 days.
Let’s now look at a fast crystal growing recipe that takes just a few hours from start to finish.
A Fast-Growing Epsom Salt Crystal Recipe
To speed up the rate of crystal growth, follow this simple saturated salt solution recipe:
You’ll Need:
- 1 cup Epsom salt
- 1/2 cup boiling water
- Small jar or glass
- Pencil or chopstick
- Food coloring (optional)
Instructions:
- Pour the boiling water into the jar.
- Slowly add the 1 cup Epsom salt while stirring until no more dissolves. This creates a saturated solution.
- Optional: Add a few drops of food coloring and stir.
- Place a chopstick or pencil in the center of the jar, with the end touching the bottom.
- Allow the jar to sit undisturbed for 4-8 hours. Crystals will begin to form on the stick.
- After 8 hours, remove the stick covered in Epsom salt crystals!
The hot water helps dissolve more Epsom salt, while the stick provides a surface for the crystals to attach to. This allows crystal growth within just a few hours.
Now let’s go over the complete instructions for setting up crystal growing experiments from start to finish.
Materials Needed for Growing Epsom Salt Crystals
Growing impressive Epsom salt crystals is easy with just a few household materials:
- Epsom Salt – Epsom salt provides the magnesium sulfate needed to form crystals. Available at pharmacies and grocery stores.
- Distilled Water – Distilled water contains fewer impurities than tap water, resulting in the best crystal formation.
- Glass Jar or Beaker – A glass container allows you to observe the crystal growth. Clean 4-8 oz jelly jars work well.
- Spoon – Use a spoon to stir the Epsom salt and water to help dissolve.
- Food Coloring (optional) – Adding a few drops of food coloring to the solution provides colorful crystals.
- Fishing Line (optional) – You can suspend a piece of fishing line in the solution to grow crystals on.
- Growing Surface (optional) – A popsicle stick, straw, or pipe cleaner placed in the jar gives the crystals a surface to attach to.
Now that we have our materials, let’s look at how to prepare the Epsom salt solution.
Preparing a Saturated Epsom Salt Solution
To grow high-quality crystals, you’ll need a supersaturated solution of Epsom salt and water. Follow these steps:
- Fill your jar half full with warm tap water. Warm water helps dissolve more Epsom salt.
- Slowly add Epsom salt to the water, 1-2 tablespoons at a time, stirring continually.
- Continue adding small amounts of salt until no more dissolves. This is the saturation point.
- Optional: Add a few drops of food coloring and stir to tint the crystals.
- Carefully place your fishing line, popsicle stick, or other growth surface in the center of the jar.
Your saturated Epsom salt solution is now ready for crystals to form! Let’s look at some techniques to produce stunning crystals.

Epsom Salt Crystal Growing Techniques
There are 3 main techniques for growing Epsom salt crystals:
Refrigerator Method
- Prepare the saturated solution as above.
- Cover the jar loosely with plastic wrap or lid.
- Place the jar in the refrigerator, ideally without disturbances.
- Check daily for crystal growth! It may take 7-14 days to achieve large crystals.
Evaporation Method
- Prepare the saturated solution.
- Cover the jar with a porous material like cheesecloth to allow slow evaporation.
- Place the jar in an undisturbed location at room temperature.
- Allow 7-14 days for the water to fully evaporate as crystals grow.
Seed Crystal Method
- Prepare the solution and place the growth surface in a jar. Allow crystals to begin forming.
- Remove the growth surface covered in small seed crystals.
- Create a new saturated solution and place the seed crystal surface in the jar.
- The seed crystals help larger crystals grow faster on the growth surface.
Now let’s look at what happens during the crystal growth process.
Observing Epsom Salt Crystal Growth
Over hours or days, you’ll begin to see crystalline structures take shape in the jar:
- At first, you may see tiny, individual needle-like crystals start to form.
- As crystals grow, the small needles connect into larger crystal clusters and structures.
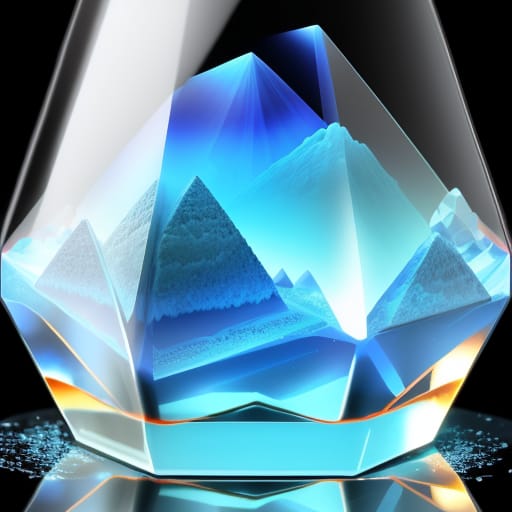
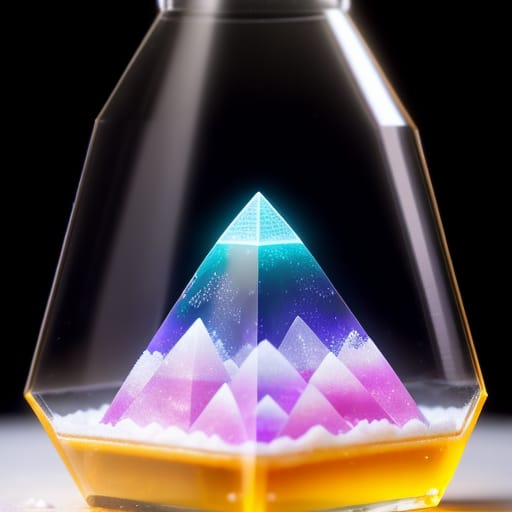
- Eventually, stable geometric shapes will emerge, from cubes to pyramids.
- Given enough time, large single crystals may form on the growth surfaces in the solution.
- The crystals have a glass-like, transparent quality and may take on the color of the food coloring.
- Fascinating crystal structures can be observed at the microscopic level.
Let the crystals fully form before gently removing them to admire their shapes and designs. The crystal structures reflect the geometric molecular patterns of Epsom salt.
Several factors impact the look and quality of the final crystals…
Factors That Affect Crystal Growth
For the best results when growing your own Epsom salt crystals, there are some key factors to consider:
Temperature
- Warmer temperatures between 60-100°F allow faster evaporation for quick crystal growth.
- Colder temperatures slow evaporation, yielding larger but slower-growing crystals.
Saturation Level
- A fully saturated solution encourages faster, quality crystal growth.
- An unsaturated solution produces slow and irregular crystal formation.
Impurities
- Pure water without contaminants allows the best crystal shapes.
- Impurities or disturbances muddle crystal structure.
Motion
- Setting the jar in an undisturbed area gives the clearest crystals.
- Jostling or shaking the jar can disrupt crystal growth.
Evaporation Rate
- Fast evaporation grows crystals rapidly but with more flaws.
- Slow, gradual evaporation results in flawless crystal shapes.
Experiment to find the conditions that work best for your goals, whether growing crystals fast or producing perfect shapes.
Growing Crystals with Different Salts
While Epsom salt (magnesium sulfate) is highly recommended for crystal growing, you can experiment with different salt types:
- Table salt (sodium chloride)
- Iodized salt
- Alum (hydrated potassium aluminum sulfate)
Follow the same saturation and crystallization steps as above, using your desired salt. Here are some comparisons:
| Salt Type | Crystal Structure | Growth Time | Color |
|---|---|---|---|
| Epsom Salt | Cubic, pyramids | 1-7 days | Clear, transparent |
| Table Salt | Cubic | 1-7 days | Opaque, white |
| Iodized Salt | Cubic | 1-7 days | Opaque, purple-ish |
| Alum | Octahedral | 2-10 days | Transparent |
(Table 1: Comparisons of different salt types for crystal growing experiments.)
The crystal structure, growth time, and color will vary based on the salt type. Epsom salt provides the most transparent, quickly growing crystals.
Creative Uses for Homegrown Epsom Salt Crystals
Once you’ve grown beautiful Epsom salt crystals, there are many fun ways to use them:
- Create colorful crystal ornaments for the holiday tree using mini jars and pipe cleaners.
- Make crystal jewelry like necklaces and bracelets by stringing the small crystals.
- Use them in sensory play activities for kids to explore the textures and shapes.
- Give as unique gifts by presenting the crystals in jars or bags.
- Use food-safe crystals as garnishes on desserts, cakes, and drinks.
- Create crystal displays by arranging the crystals in shadow boxes, terrariums, or decorative jars.
- Make DIY bath salts by blending Epsom salt crystals with herbs, oils, and scents.
Let your creativity run wild when it comes to decorating with your homemade Epsom salt crystals!
Troubleshooting Issues and Tips for Success
When trying to grow perfect Epsom salt crystals, you may encounter some issues. Here are some troubleshooting tips:
Problem: Crystals Won’t Form
- Check that the water is fully evaporated. Crystallization can’t begin until the solution is fully saturated.
- Ensure the water temperature is warm when dissolving the Epsom salt to reach saturation.
- Add more Epsom salt to the water a bit at a time until no more dissolves.
Problem: Crystals Growing Too Slowly
- Increase water temperature slightly to about 100°F to speed evaporation.
- Use distilled water for fastest growth. Tap water minerals slow crystallization.
- Don’t cover the container so evaporation can occur.
Problem: Crystal Clumps Instead of Singular Crystals
- Try the seed crystal method to promote singular crystal growth.
- Ensure there are no disturbances like vibrations as the crystals form.
- A slow evaporation rate yields the best defined singular crystals.
For Best Results:
- Use warm distilled water when preparing the solution.
- Completely saturate the water with Epsom salt until no more dissolves.
- Allow the solution to fully evaporate in an undisturbed area before moving the crystals.
- Be patient! Proper crystals can take 7-14 days to form.
(Table 2: Troubleshooting tips for crystal growing experiments.)
With a little practice, you’ll be growing stunning Epsom salt crystals consistently.
The Science Behind Crystal Formation
Now that you know how to grow Epsom salt crystals, you may be wondering how they form. Here’s a quick look at the science:
- Epsom salt dissolves into individual ions when mixed in water, with magnesium and sulfate ions freely moving around.
- As water evaporates, the ion concentration increases until the solution becomes saturated.
- The ions start to join together in an orderly, crystalline structure, starting with a small “seed” crystal.
- Given the right conditions, these crystal structures grow larger as more ions attach in geometric patterns.
- Eventually, a stable crystalline solid forms that reflects Epsom salt’s molecular lattice structure.
- Impurities or disturbances disrupt the ion attractions, leading to flawed crystals.
The amazing crystal shapes and designs emerge from Epsom salt’s inherent molecular order!
Grow Your Own Epsom Salt Crystals
Growing impressive crystals is an easy science experiment using common Epsom salt. With a bit of patience and the right technique, you can create beautiful crystalline structures at home.
Use this beginner’s guide to set up your own Epsom salt crystal creations. Experiment with different conditions to see the various crystal shapes and structures you can produce. Make colorful crystal ornaments, jewelry, displays, and more.
The magic is in the science! Understanding how crystals form gives you greater control over the results. Impress your friends with your stunning handmade crystals.
Have fun unleashing your inner mad scientist with this simple kitchen chemistry project. May your Epsom salt crystals grow large and in perfect geometric forms!
References and Resources:
[1] Professor of Chemical Engineering at the University of Wisconsin. How to Grow the Best and Largest Epsom Salt Crystals. 2021.
[2] Smithsonian Science Education Center. Crystal Recipe: Epsom Salts. 2020.
[3] Royal Society of Chemistry. Growing Crystals. 2022.
Frequently Asked Questions
What is the fastest way to grow Epsom salt crystals?
The fastest way to grow Epsom salt crystals is to create a saturated solution with very warm distilled water. Use a seed crystal method and place the jar in an undisturbed warm area for 4-8 hours to speed up crystal growth. You can have small but nicely formed crystals in less than a day!
How can I make big Epsom salt crystals?
To make large Epsom salt crystals, use distilled water and fully saturate the solution. Cover the jar loosely and allow slow evaporation over 7-14 days. The slow crystallization will yield the largest crystal size as ions have time to attach in an orderly structure. Avoid disturbances and vibrations as the crystals grow.
What causes Epsom salt crystals to form clumps?
Epsom salt crystals may form clumps or clusters if the solution isn’t fully saturated or if there are disturbances like vibrations during crystal growth. Impurities in tap water can also disrupt the formation of singular crystals. Use the seed crystal method and allow the crystals to fully form in an undisturbed area for best results.
Can I use table salt instead of Epsom salt to grow crystals?
You can substitute table salt or iodized salt to grow crystals, but Epsom salt provides the clearest, most transparent crystals with the best defined geometry. Table salt crystals tend to be smaller and take on a cubic shape. Epsom salt’s molecular structure lends itself to large, flawless crystals.
What colors can I make Epsom salt crystals?
Adding a few drops of liquid food coloring to the Epsom salt solution before crystallization allows you to grow crystals in any color. Reds, blues, and purples create brilliant crystal colors. For pastels, dilute the food coloring first in water. Mix colors to grow rainbow colored crystal clusters!