If you’re looking for a fun and educational DIY project for your kids, space-themed crafts are a great place to start. At the same time, it can be tricky to decide between different projects, such as kite-making and paper airplane-making. In this article, we’ll explore the advantages of DIY projects and provide a detailed comparison of space-themed kite-making and paper airplane-making, including materials required, step-by-step guides, tips, tricks, cost, difficulty level, time required, safety precautions, and ways to incorporate science and space education into your projects. By the end, you should be able to determine which DIY project will best suit your child’s needs.
Introduction: The Importance of Space-themed DIY Projects for Kids
DIY space-themed projects can be a fun and educational way to introduce children to science, technology, engineering, and math (STEM) concepts and engage their creativity. Plus, by working on a project together, you can bond with your child and create lasting memories. DIY projects also teach persistence, patience, problem-solving skills, and a sense of accomplishment when the project is complete. With space-themed projects, children can imagine space exploration, learn about the solar system, and understand the importance of scientific discovery.
Moreover, space-themed DIY projects can also help children develop their fine motor skills and hand-eye coordination. For instance, building a model rocket or a space shuttle requires precision and attention to detail, which can improve a child’s dexterity and spatial awareness. Additionally, space-themed projects can inspire children to pursue careers in STEM fields and foster their curiosity about the universe and its mysteries.
Furthermore, space-themed DIY projects can be adapted to different age groups and skill levels, making them accessible to a wide range of children. From simple crafts like making a paper mache planet to more complex projects like building a robotic rover, there are plenty of options to choose from. Parents and educators can also use space-themed projects as a tool to teach children about teamwork, communication, and collaboration, as they work together to complete the project.
Advantages of DIY Projects for Children’s Development
DIY projects offer several benefits for children’s development. When working on a DIY project, children can improve their fine motor skills, hand-eye coordination, and spatial awareness. They also learn how to follow directions, think critically, and use their imagination to problem-solve. Moreover, DIY projects offer children the opportunity to express themselves creatively and practice patience and attention to detail. All in all, DIY projects help children develop the skills and traits they need for academic and personal success.
Additionally, DIY projects can also help children develop a sense of accomplishment and boost their self-esteem. When they complete a project on their own, they feel a sense of pride and confidence in their abilities. This can motivate them to take on more challenging projects and develop a growth mindset. DIY projects can also foster a sense of independence and responsibility as children learn to plan and execute their projects with minimal adult supervision. Overall, DIY projects are a fun and effective way to promote children’s holistic development.
Materials Required for Space-themed Kite Making and Paper Airplane Making
Both kite-making and paper airplane-making require some basic materials. For kite-making, you’ll need kite paper or tissue paper, a bamboo stick or plastic rod, string, glue, scissors, rulers, pencil or pen, and streamers or ribbons (optional). For paper airplane-making, you’ll need paper, scissors, and a ruler. Space-themed kites and paper airplanes may require additional materials, such as paint, markers, stickers, or solar system images.
If you’re making a space-themed kite, you may want to consider using metallic or iridescent paper to give it a futuristic look. You can also add glow-in-the-dark paint or stickers to make it stand out at night. Additionally, you can attach a small toy astronaut or spaceship to the kite for added decoration.
For paper airplanes, you can experiment with different types of paper to see which ones fly the farthest or stay in the air the longest. You can also add designs or patterns to the paper using markers or colored pencils. To make a space-themed paper airplane, you can draw planets or stars on the wings or use stickers to create a galaxy-inspired design.
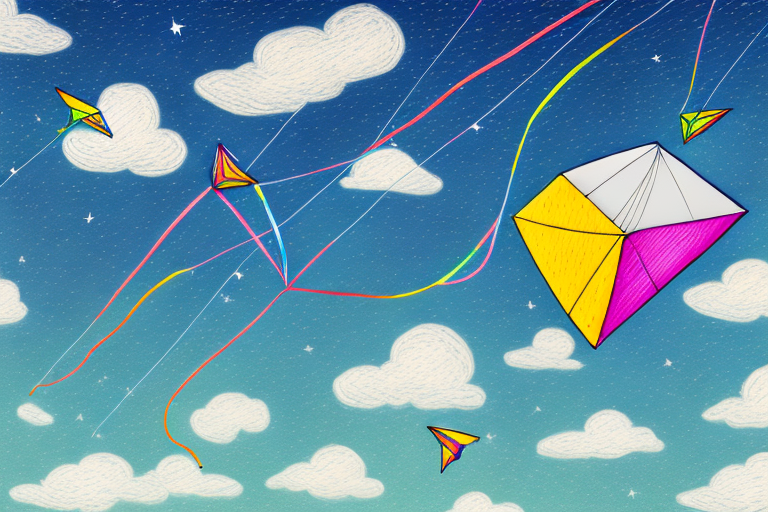
Step-by-Step Guide to Making a Space-themed Kite
Making a space-themed kite can be a little more complicated than making a paper airplane, but the result can be stunning!
1. Choose or draw a space-themed image for your kite, such as a planet, a star, or a spaceship.
2. Cut out the image on the kite paper or tissue paper, leaving a border of around one inch.
3. Glue the bamboo stick or plastic rod to the back of the image, following the border. Leave some space at the top and bottom of the stick for attaching the string and streamers.
4. Cut a length of string that matches the length of the rod. Glue it to the top of the stick, folding it over the stick and tying a knot. Leave a tail of around 12 inches for stability.
5. Cut a longer length of string for flying the kite, around five times the length of the rod. Attach it to the bottom of the stick, again folding it over the stick and tying a knot. Leave a tail of around 12 inches for stability.
6. Attach streamers or ribbons to the bottom of the kite for decoration and stability.
7. Fly your space-themed kite in an open area with no trees or power lines. Hold onto the tail and let the wind carry the kite upwards!
When choosing the image for your space-themed kite, consider using a real image from NASA or other space agencies. You can print these images onto kite paper or tissue paper for a more realistic and detailed design. Some great options include images of galaxies, nebulas, or even the Earth from space. This will make your kite truly unique and impressive!
Tips and Tricks for Making a Durable and Functional Kite
Making a kite can be a little challenging, but with some tips and tricks, you can ensure that your kite will last and fly well.
– Use strong glue, such as white glue or glue sticks, and let it dry completely before flying.
– Cut the, kite paper or tissue paper carefully and smoothly to avoid wrinkles or unevenness.
– Avoid sharp corners or angles in the kite design, as they can cause the kite to flip or spin uncontrollably.
– Use a light and sturdy rod or stick, such as bamboo or carbon fiber, to support the kite.
– Fly the kite in moderate winds, such as 5 to 15 mph, without rain or lightning.
Another important tip for making a durable and functional kite is to reinforce the kite’s frame with additional materials, such as tape or string. This will help to prevent the kite from breaking or collapsing during flight.
Additionally, it’s important to choose the right type of string or line for your kite. A strong and lightweight material, such as nylon or Dacron, is recommended for optimal performance and durability.
Step-by-Step Guide to Making a Space-themed Paper Airplane
Making a space-themed paper airplane is relatively easy and fun for kids of all ages.
1. Fold a piece of paper in half, lengthwise, and crease it well.
2. Open the paper and fold down the top corners to the center crease, making a triangle at the top.
3. Fold down the top triangle to the bottom edge, aligning it with the center crease, and crease it well.
4. Fold down the half of the remaining top rectangle to meet the bottom edge, forming a smaller triangle.
5. Fold the wings down, along the center crease, to align with the bottom edge.
6. Fold the wings up, along the outside creases, to create the space-themed design or decoration you want.
7. Release the paper airplane, holding the bottom edge, and let it fly!
Tips and Tricks for Making a High-flying Paper Airplane
Making a paper airplane that flies well and looks good can be a challenge, but with some tips and tricks, you can master the skill.
– Use thin and smooth paper, such as printer paper or origami paper, for better folding and flight.
– Fold each crease with precision and press it down firmly with your fingers or a blunt tool.
– Avoid using too much or too little force when throwing the paper airplane. A gentle but swift toss is best.
– Adjust the wings’ angle and curvature to achieve more or less lift and stability.
Comparison of Difficulty Level: Kite Making vs Paper Airplane Making
While making a space-themed kite can be more challenging than making a space-themed paper airplane, both projects are appropriate for kids of various ages and skill levels. Kite-making may require more concentration and patience, but paper airplane-making offers more flexibility and creativity in design. It’s up to you and your child to choose which project is more appropriate and enjoyable.
Comparison of Cost: Kite Making vs Paper Airplane Making
The cost of making a space-themed kite or paper airplane depends on the materials you use. Kite-making may require more specialized materials, such as kite paper or bamboo sticks, which may cost more than regular paper and scissors. However, if you already have the materials at home or in your local craft store, both projects can be affordable and accessible.
Comparison of Time Required: Kite Making vs Paper Airplane Making
The time required to make a space-themed kite or paper airplane depends on the complexity of the design and the skill level of the maker. Kite-making may require more time and attention to detail, especially when cutting and gluing the paper, attaching the rod and string, and decorating the kite. Paper airplane-making may take less time and effort, depending on how elaborate you want the design to be. In general, both projects can be completed within an hour or two, allowing for breaks and adjustments.
Safety Precautions to Take When Flying Kites or Paper Airplanes with Children
Flying kites and paper airplanes can be a safe and enjoyable experience, but it’s important to take some precautions to prevent accidents or injuries.
– Choose a spacious and open area, such as a park or a beach, with no obstacles or crowds.
– Check the weather conditions beforehand and avoid flying kites or paper airplanes in high winds or stormy weather.
– Ensure that the kite string or paper airplane doesn’t come into contact with trees, power lines, or other people.
– Supervise young children when flying kites or paper airplanes, and teach them the proper way to hold and release them.
– Wear sunscreen, hats, and sunglasses to protect yourself and your child from the sun and wind.
Fun Ways to Incorporate Science and Space Education into DIY Projects for Kids
DIY space-themed projects offer an excellent opportunity to teach children about science and space education in a fun and interactive way.
– Research and discuss different planets, stars, and galaxies, and encourage your child to incorporate them into their designs.
– Explore the principles of aerodynamics and flight, and show your child how the shape, size, and weight of a kite or paper airplane affect its performance.
– Learn about the history of space exploration and the contributions of scientists and engineers, and inspire your child to pursue a career in STEM fields.
– Experiment with different materials, colors, and patterns, and encourage your child to come up with their own unique designs and innovations.
Conclusion: Which DIY Project is Best Suited for Your Child’s Needs?
Choosing between space-themed kite-making and paper airplane-making may depend on various factors, including your child’s age, skill level, interests, and resources. Kite-making can be more challenging and time-consuming, but also more immersive and rewarding, especially for older children. Paper airplane-making can be more versatile and creative, but also simpler and quicker, making it suitable for younger children or those with shorter attention spans. Ultimately, whether you choose kite-making or paper airplane-making, or both, the most important thing is to have fun and learn something new along the way!